TransitionsPortal Transfer
Placing a portal
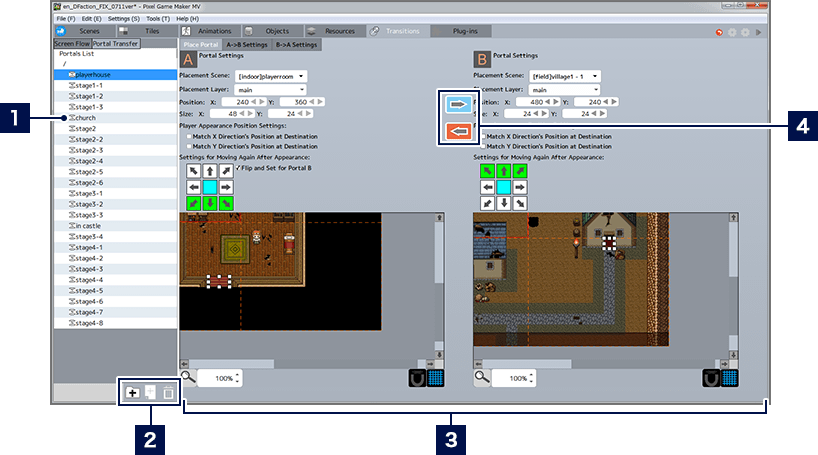
When setting up a Portal Transfer, you will first place Portals at two points, A and B. Then you will perform setup relating to the transitions between A to B and B to A.

- 1Portal List
- This is a list of added portals. When configuring a new Portal Transfer, either click the menu button at the bottom of the list, or select "Add Portal" from the context menu.
- 2Menu Buttons
-
 Add Folder
Adds folders to the list.  Add Portal
Adds a new portal to the list.  Delete Item
Deletes the selected item. - 3Portal Settings Area
- Configure Portal A in the left half of the Area, and Portal B in the right half.
- 4Transition ON/OFF Button
- Click the button to toggle between ON and OFF. Players will not be able to transition via Portal in the directions where the arrow is turned OFF.
Portal Placement Procedure
Select the layer and scene for Portal A and B to be placed in, and specify the Portal position and size. You can specify position and size using numbers, or specify by moving the Portal directly on the map (Portals are indicated by a red, semi-transparent box). Additionally, you can also specify the position or direction of movement for the player character when they appear from the portal.
Configuring Transitions
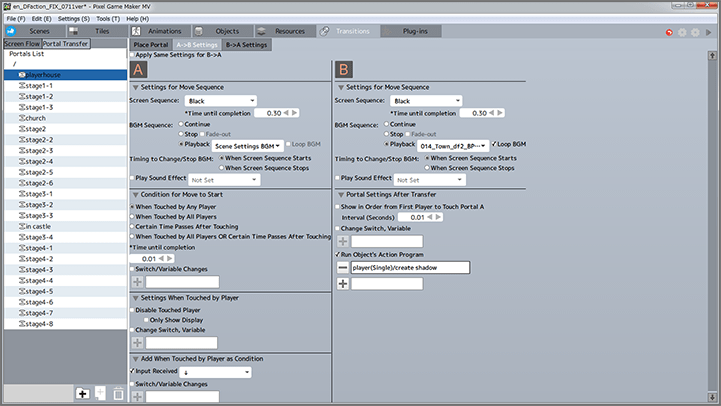
By selecting the "A→B Settings" or "B→A Settings" tabs, you can perform set-up pertaining to each transition. You can configure the sequence on transition, the conditions for the transition to start, Switch and Variable changes effected when the player character touches the Portal, and so on. You can also set up Swich and Variable changes effected after transitioning via Portal, as well as object behaviors.
